
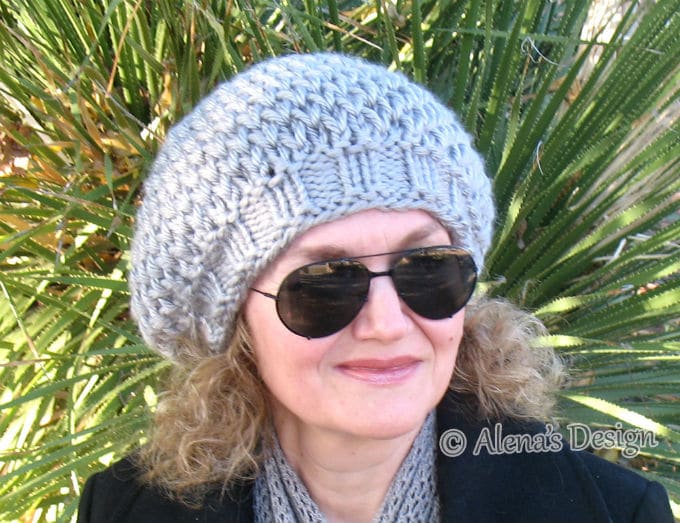
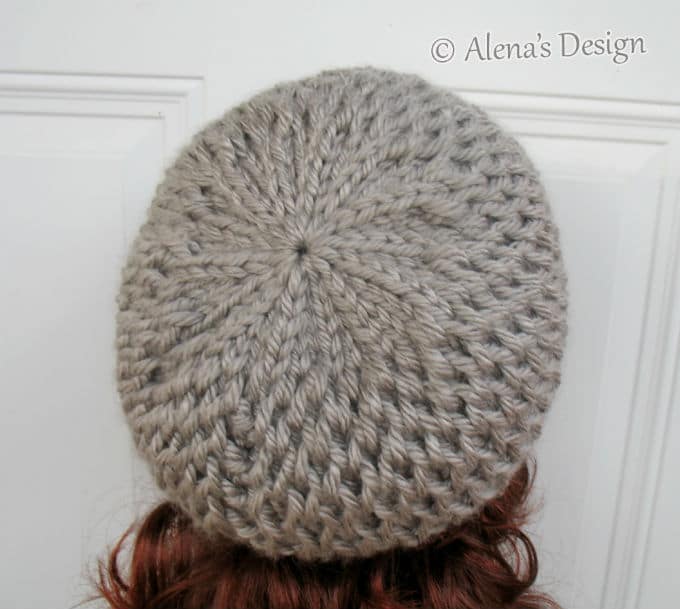
This Knitted Slouchy Hat keeps you warm on those really cold days! Easy, fast knitted, and nice looking Honeycomb pattern!
DISCLOSURE This post contains affiliate links. If you choose to purchase the product or service via my affiliate link, I will get a small commission. This is at no extra cost to you, but it helps me to run this site. Buying the materials necessary to create new designs, and subsequently sharing it with you. I only recommend products that I like, and have used myself. Thank you for your support.
SKILL LEVEL
Intermediate
SIZE AND FINISHED MEASUREMENTS
Toddler – Head Circum. 19.0”/ 48 cm; Height: approx.8.0”/ 20 cm
Child – Head Circum. 21.0”/ 53 cm; Height: approx. 9.0”/ 23 cm
Teen/Adult – Head Circum. 22.0”/ 56 cm; Height: approx.10.0”/ 25.4 cm
Adult – Head Circum. 24.0”/ 61 cm; Height: approx. 11.0”/ 28 cm
MATERIALS
Lion Brand “Hometown USA” (100% Acrylic 5oz/142g; 81yd/74m); Super Bulky weight.
(149 Dallas Grey, or 099 Los Angeles Tan) – approx. 1 (2, 2, 2) balls;
or
Lion Brand “Wool-Ease Thick & Quick” (80% Acrylic, 20% Wool 6oz/170g; 106yd/97m); Super Bulky weight – approx. 1 (1, 2, 2) balls;
- US size 10 / 6 mm Knitting Needles; US size 13 / 9 mm Knitting Needles; OR SIZE TO OBTAIN GAUGE.
- Matching thread and needle.
- Yarn needle.
GAUGE
10 sts and 13 rows to 4”/10 cm over Honeycomb Pat using size 13 (9 mm) needles.
(Note: Be sure to check your gauge before starting to knit. If the gauge is larger, change to a smaller needle size. If it is smaller, change to a larger needle size.)
INSTRUCTIONS
Notes:
- Instructions are written for the smallest size with changes for larger sizes given in parentheses. When only one number is given, it applies to all sizes.
- The hat is worked back and forth in rows from bottom to top.
- For ease in working, circle all numbers pertaining to size that you’re making.
- To avoid mistake(s), count stitches in each row when finished.
HAT
With smaller needles, loosely cast on 40 (48, 56, 64) sts.
Row 1 (WS): Knit all sts – 40 (48, 56, 64) sts.
Rows 2-6: Work in K2, P2 Ribbing for 5 rows.
K2, P2 Ribbing
Row 1: * K2, p2 ; repeat from * across.
Row 2: K the knit sts and p the purl sts.
Repeat row 2 for K2, P2 Ribbing.
Row 7 (WS): Knit all sts – 40 (48, 56, 64) sts.
Change to larger needles, and work in Honeycomb Pat until hat measures 6.0 (7.0, 8.0, 9.0)” / (15.0, 17.8, 20.3, 22.9) cm from beg, end with a Row 5.
Honeycomb Pattern
Multiple: 2
Foundation Row (RS): K3, YO, * k2, YO; rep from * across, end k1 – 59 (71, 83, 95) sts.
Row 2 (WS): K1, * k the YO and the next st tog, YO, slip next st purlwise; rep from * across, end k1 – 59 (71, 83, 95) sts.
Row 3 (RS): * K2, slip YO st purlwise; rep from * across to last two sts, end k2 – 59 (71, 83, 95) sts.
Row 4 (WS): K1, * YO, slip next st purlwise, k the YO and the next st tog; rep from * across, end k1 – 59 (71, 83, 95) sts.
Row 5 (RS): K3, * slip YO st purlwise, k2; rep from * across, end slip YO st purlwise, k1 – 59 (71, 83, 95) sts.
Repeat rows 2-5 for Honeycomb Pat.
Next Row (WS): K1, * p the YO and the next st tog, p1; rep from * across, end k1 – 40 (48, 56, 64) sts.
Shape crown
Next (Dec) Row: * K2, k2tog, repeat from * across – 30 (36, 42, 48) sts.
Next Row: Purl all stitches.
Next (Dec) Row: * K1, k2tog, repeat from * across – 20 (24, 28, 32) sts.
Next Row: Purl all stitches.
Next (Dec) Row: (K2tog) across – 10 (12, 14, 16) sts.
Cut yarn, leaving a long yarn tail, and pull yarn through the remaining sts. Then, tighten together and secure. Sew sides together.
FINISHING
Weave in all yarn ends to wrong side of work.
STITCH ABBREVIATIONS
approx – approximately; beg – beginning; dec- decrease(ing); dpn – double-pointed needle(s); k – knit; k2tog – knit two stitches together; lp(s) – loop(s); oz – ounce(s); p – purl; rem – remain/remaining; rep – repeat(s); Rnd(s)- round(s); RS – right side; sl – slip; st(s) – stitch(es); St st – Stockinette stitch; tog – together; WS – wrong side; () – work directions in parentheses the number of times specified; * – repeat instructions following the single asterisk as directed; ” – inch(es);
You may get the PDF pattern here
© Alena’s Design patterns are protected by copyright. You may not rewrite, photocopy, redistribute, or sell the patterns in any form. You have my permission to sell the finished product if you will credit me for the pattern with a link to my site: https://www.alenasdesign.com/ when listing or selling the items made from patterns. If you need any help with my patterns, you may contact me: www.www.alenasdesign.com/contact-us